 A process for cleaning Drake chassis
By Ron Wagner
Introduction:
Cleaning of copper chassis is a matter of preference. I have a method of cleaning the spots of a Drake chassis that has some advantages and disadvantages. This process should be looked at and you personally determine if it is what you desire or not.
This article will discuss cleaning and options to make the cleaned area blend in with the rest of the chassis. Keep in mind that the process and options use abrasives. The copper can be taken completely off of the chassis if extreme care is not taken while processing. Use the process at your own risk.
I ask many times via many avenues about cleaning chassis spotting and corrosion. I never was given any really good process. I was given many ideas, each of which had merits and shortcomings. I finally found a method which works well for me, and offer it to others for potential use. I will stress that "your mileage may vary".
I have not found a good solution for re lettering. If anyone can has a way to restore the lettering on the chassis, please advise.
Process description:
Ever since I video taped the Dayton Drake forum "The Drake Engineers Reunion" I have been watching the tape and finding new little tid-bits of information. One major item that I picked up on was that the copper chassises were lacquered. That makes a lot of sense then with what we see on the deterioration. Obviously those rigs which were well cared for and reasonably handled are still generally nice and shiny. If the lacquer did not get damaged, the chassis more or less stayed "mint". Over time, the lacquer can wear away, or develop minor pinholes and the copper oxidizes and goes bad.
Give that information, here is some information on experiments that I have done. Basically I clean the chassis with polish and then recoat. Please read the entire article as there are options listed further down that might be of interest to assisting in matching the cleaned area with the original chassis color and shine.
Keep in mind that the copper coating is thin and can be completely taken off easily.
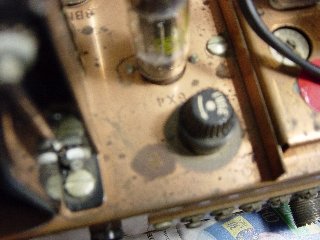
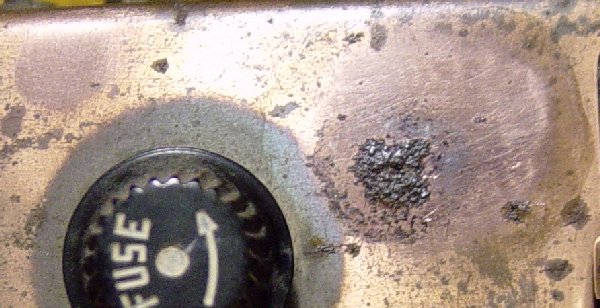
Cleans spots
The cleaned spot is "mirror shiny"
Dremel type motor tool with flexible shaft
1. Take the Dremel brush and mount via the flexible shaft. If you need more
information on this step, kindly see your Dremel tool manual. And if that
doesn't get you there, maybe you should not be touching your Drake's internals
:-) Obviously, for an entire chassis you will need several sessions. Keep in mind
that you are trying to clean and coat. Don't get skin oils on the chassis!!!
Don't let the chassis sit too long, or it will tarnish. How long is too long,
well I really do not know. Also keep in mind that Flitz is a
mild abrasive, it will take the copper off of the steel if you let it dry out
while polishing, or polish too much.
The cleaned area is really shiny, so much so that it looks strange, unless
you do the whole chassis. There are ways to make it look more like the rest of
the chassis. The process is outline in options below.
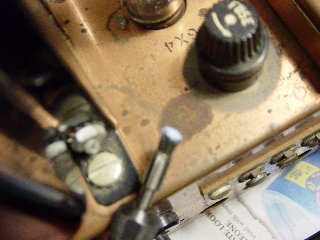
73, My apology for my poor pictures. Still learning how to use my digital camera.
Advantages:
Allow sealing of chassis to prevent further oxidation
To a
lesser extent, this process will clean and stop corrosion from progressing
further
Disadvantage:
The cleaned spot is brighter then the
rest of the chassis
Corrosion can not be totally removed and repaired, only
stopped
This method will remove stencil letters
Equipment:
Dremel type nylon brush
tool
Flitz polish (other brands may work) got mine at ACE hardware
Model
airplane "dope" (A type of paint finish which I think is lacquer
based)
Q-tips or artist paint brush
Process:
2. Open the Flitz and squeeze just a bit up to the top of the tube
3.
Dip your nylon Dremel brush into the Flitz
4. Start the Dermal at a slow to
medium rpm (definitely not full rpm as that will throw the Flitz off the
brush)
5. Use the brush to slowly "scrub" an area that is spotted or
corroded
6. Watch so that you don't get too big of an area going
7. Watch
so that when the Flitz starts to dry slightly that you stop
8. Wipe away the
remaining Flitz with a paper towel
9. You should have a nice shiny area where
you just cleaned. Some times the Flitz leaves the area a bit dark. Take a clean
paper towel and buff the area to clean it good
10. Within a few hours, take a
Q-tip and dip into the airplane dope. The idea is not to let the copper get
dirty or worse yet your skin oils on before you coat it
11. Use the Q-tip to
roll over the area you have cleaned
12. Roll the Q-tip right/left, then
up/down. You want to get a nice coating
13. Make sure you have the cleaned
area covered and sealed with airplane dope
14. You have just repaired your
spotted chassis
15. Let the airplane dope dry and inspect, a second coating
may be in order
Option 1:
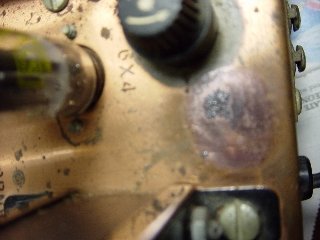
If you let the cleaned area "age" (tarnish) for a while,
it will look more like the rest of the chassis. In my pics, I have a part
cleaned about a year ago that was not sealed with lacquer. The part has
tarnished into the correct "color". Flitz is a polish, so the cleaned area will
be more "mirror like". The tarnished area is still mirror like. The tarnished
area is color wise similar to the original chassis color.
Option 2:
To make the cleaned area look more like the rest of the
chassis, let it tarnish on its own, it can take up to a year for color to match.
Now some may not like the shine of the spot even after tarnish. That can be
addressed if you desire with some 0 grade SYNTHETIC steel wool. Synthetic is
made of plastic. Do not use metal as it leaves little conductive steel "hairs".
Basically you want to roughen up the area immediately after cleaning. Flitz is a
polish and shines with cleaning. After roughening, let the area tarnish on its
own. Over time, it will tarnish to a color that will match the original chassis,
at that time, seal with lacquer. Please be aware that steel
wool has a high possibility of going through the copper plating.
Suggestion for your first attempt at this process
I suggest that you
get a piece of copper PC board to practice on before you try your Drake chassis.
It would be really good to do your testing on something far less precious then
your Drakes. Good Luck.
Ron WD8SBB